Most of the embedded projects have some user interfaces, most of them uses LCD displays for output
 First Create a MPLAB X project as in the steps for Blinking a LED using MPLAB X , PIC16F877A
Components
1.PIC16F877A micro controller
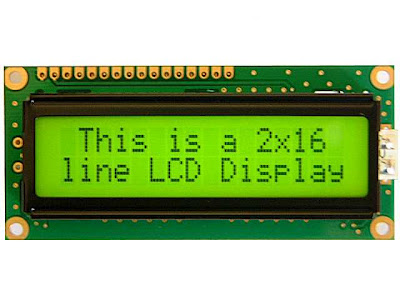
2. 2x16 LCD Display
Most of the LCD have 16 Pins
3 Control Pins
8 Data Pins
4 Power Pins


THE PROGRAM IS AVAILABLE ON GITHUB : https://github.com/ebine/lcd-interface-pic16f877a
# include<htc.h>
#if defined(WDTE_OFF)
__CONFIG(WDTE_OFF & LVP_OFF);
#elif defined (WDTDIS)
__CONFIG(WDTDIS & LVPDIS);
#endif
#define RS RE0
#define RW RE1
#define EN RE2
#define DATA PORTB
void LCD_CMD(unsigned int value);
void LCD_DAT(unsigned int value);
void delay();
int main(void)
{
ADCON0 = 0x00;//Disable ADC ports
ADCON1 = 0x06;//Disable ADC ports
TRISE =0x00;
TRISB =0x00;
//DATA=0x01;
LCD_CMD(0x01);
delay ();
LCD_CMD(0x38);
delay ();
LCD_CMD(0x0F);
delay ();
// LCD_CMD(0x07);
delay();
LCD_CMD(0x06);
delay ();
LCD_CMD(0x0c);
delay ();
LCD_CMD(0x80);
delay ();
//DATA='A';
LCD_DAT('S');
LCD_DAT('E');
LCD_DAT('R');
LCD_DAT('V');
LCD_DAT('4');
LCD_DAT('U');
LCD_CMD(0x80);
while(1);
return (0);
}
void LCD_CMD(unsigned int value)
{
DATA =value;
RS=0;
RW=0;
EN=1;
delay ();
EN=0;
delay ();
}
void LCD_DAT(unsigned int value)
{
DATA=value;
RS=1;
RW=0;
EN=1;
delay ();
EN=0;
delay();
}
void delay(void)
{
int counter = 0;
for (counter = 0; counter<10000; counter++) {
;
}
}
Here we are going to see how to interface an 16x2 LCD with PIC16F877A

Components
1.PIC16F877A micro controller
2. 2x16 LCD Display
Most of the LCD have 16 Pins
3 Control Pins
8 Data Pins
4 Power Pins

Steps For Interfacing LCD
1. Take two ports make one as input and other as output by loading 1 to TRIS register and 0 to TRIS respectively
Step 1: Initialize the LCD.
The LCD must be initialized the by following pre-defined commands of character LCD.
· 0x38, to configure the LCD for 2-line, 5x7 font and 8-bit operation mode
· 0x0C, for Display On and Cursor Off
· 0x01, to Clear Display screen
· 0x06, to increment cursor
· 0x80, to set cursor position at first block of the first line of LCD.
Step 2: Send the commands to LCD.
· Send the command byte to the port connected to LCD data pins
· RS=0, to select command register of LCD
· RW=0, to set the LCD in writing mode
· EN=1, a high to low pulse to latch command instruction
· Delay of 1ms
· EN=0
Step 3: Send data to LCD.
· Send data at the port which connected to LCD data pins
· RS=1, register select to select data register of LCD
· RW=0, this set the LCD in writing mode
· EN=1, a high to low pulse to latch data
· Delay of 1ms
· EN=0
Step 4: Display character on LCD.
The functions lcdcmd() and lcddata() are user-defined functions. They are used to send a character (E in this case) to be displayed on LCD.
LCD_CMD(0x38); // send command 0x38 to LCD
LCD_DAT(‘E’); // send character E to LCD
schematic diagram :
schematic diagram :

THE PROGRAM IS AVAILABLE ON GITHUB : https://github.com/ebine/lcd-interface-pic16f877a
# include<htc.h>
#if defined(WDTE_OFF)
__CONFIG(WDTE_OFF & LVP_OFF);
#elif defined (WDTDIS)
__CONFIG(WDTDIS & LVPDIS);
#endif
#define RS RE0
#define RW RE1
#define EN RE2
#define DATA PORTB
void LCD_CMD(unsigned int value);
void LCD_DAT(unsigned int value);
void delay();
int main(void)
{
ADCON0 = 0x00;//Disable ADC ports
ADCON1 = 0x06;//Disable ADC ports
TRISE =0x00;
TRISB =0x00;
//DATA=0x01;
LCD_CMD(0x01);
delay ();
LCD_CMD(0x38);
delay ();
LCD_CMD(0x0F);
delay ();
// LCD_CMD(0x07);
delay();
LCD_CMD(0x06);
delay ();
LCD_CMD(0x0c);
delay ();
LCD_CMD(0x80);
delay ();
//DATA='A';
LCD_DAT('S');
LCD_DAT('E');
LCD_DAT('R');
LCD_DAT('V');
LCD_DAT('4');
LCD_DAT('U');
LCD_CMD(0x80);
while(1);
return (0);
}
void LCD_CMD(unsigned int value)
{
DATA =value;
RS=0;
RW=0;
EN=1;
delay ();
EN=0;
delay ();
}
void LCD_DAT(unsigned int value)
{
DATA=value;
RS=1;
RW=0;
EN=1;
delay ();
EN=0;
delay();
}
void delay(void)
{
int counter = 0;
for (counter = 0; counter<10000; counter++) {
;
}
}

0 komentar:
Post a Comment